There are millions of Discord servers, ranging from barely usable to improved and polished servers. When a user is trying to find servers to join, they are very likely to pick the popular and overall better option.
Creating a server is easy, but improving it might be a bit harder. We’re here to help you transform your good Discord server into a great one. In this guide, you will learn how to create a Discord server on different platforms, the basics of good servers, and how to transform them into great ones.
How to Create a Discord Server
Before you start taking it from good to great, you should make sure you have a server to begin with. If you do, you can skip this part; if not, let’s see how you can create a server!
Below, you can see the basic steps of making servers on desktop and mobile devices.
If you want to learn more about making a server, check out our detailed guide
Creating a Server on a Desktop
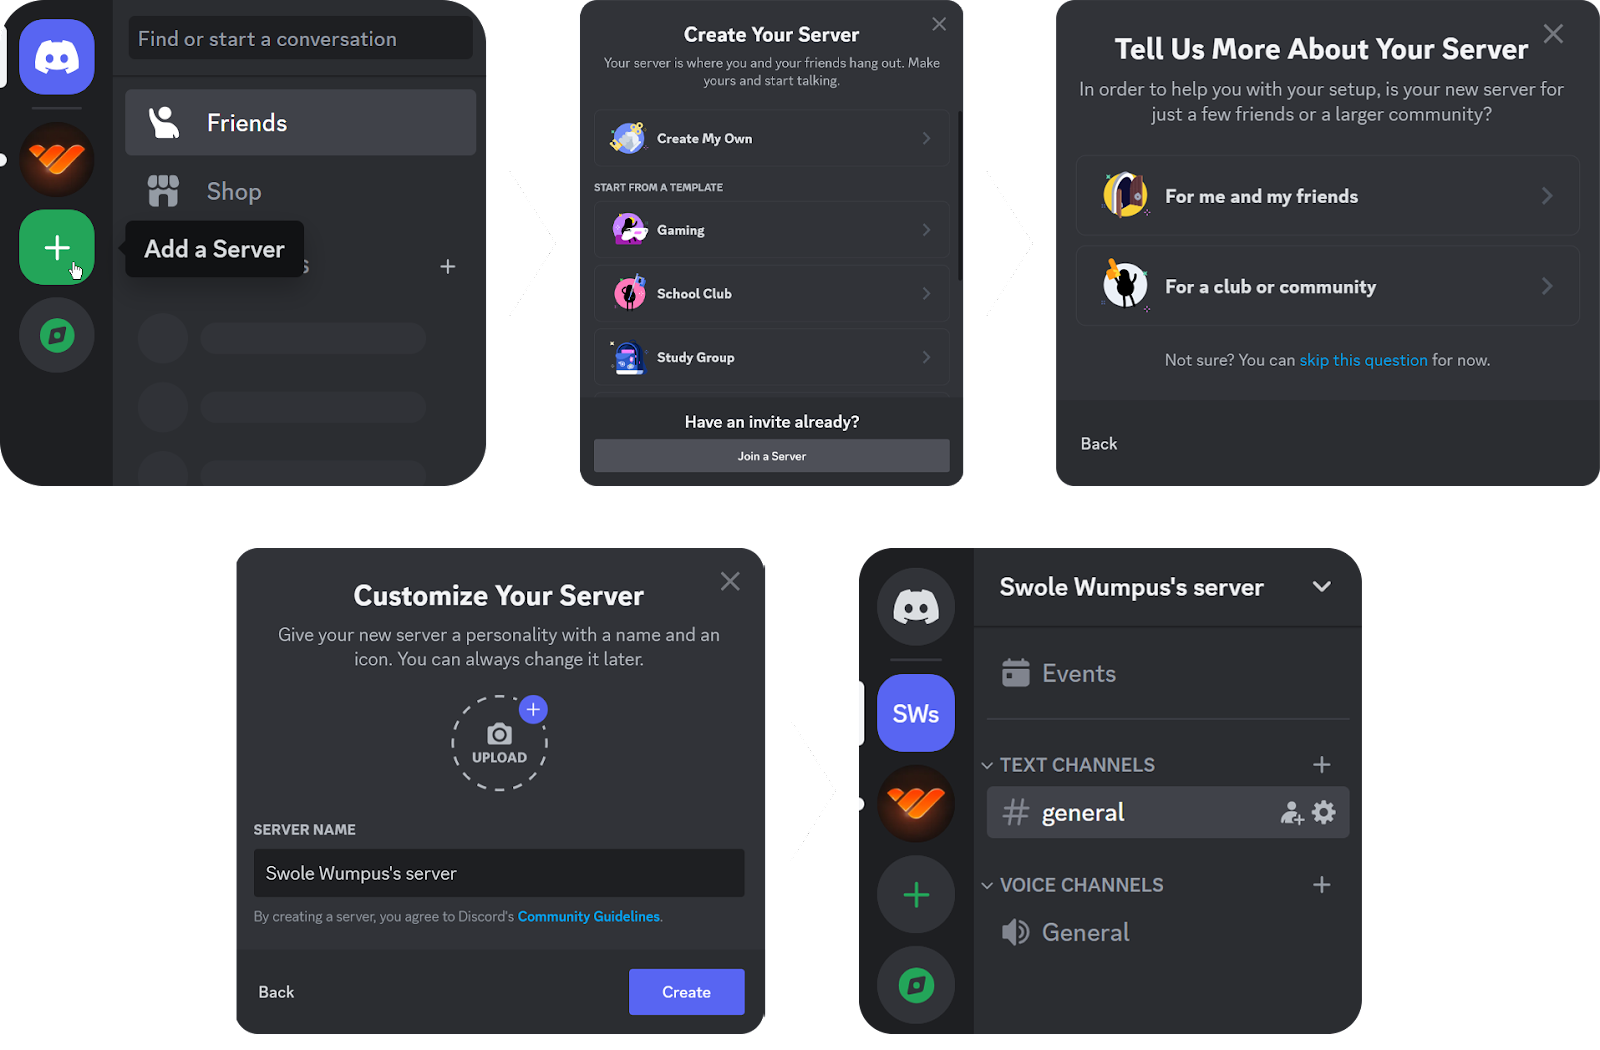
Since Discord prioritizes the desktop build, it’s incredibly easy to create a server on a desktop. Follow our steps below, and you’ll have your own server in no time:
- Click the Add a Server button (plus icon) at the left panel where your server list is. This will open the Create Your Server window.
- In the "Create Your Server" pop-up, select either "Create My Own" to start from scratch (a "general" text channel and a "General" voice channel) or one of the templates below it to begin with a basic outline. Selecting a template will only create additional channels at the end, and it doesn't change any part of the setup process.
- Gaming Template: "general" and "clips and highlights" text channels and "Lobby" and "Gaming" voice channels
- School Club Template: "welcome-and-rules," "announcements," "general," "meeting-plans," and "off-topic" text channels and "Lounge," "Meeting Room 1", and "Meeting Room 2" voice channels
- Study Group Template: "welcome-and-rules," "notes-resources," "general," "homework-help," "session-planning," and "off-topic" text channels and "Lounge," "Study Room 1", and "Study Room 2" voice channels
- Friends Template: "general," "games," and "music" text channels and "Lounge" and "Stream Room" voice channels
- Artists & Creators Template: "welcome-and-rules," "announcements," "general," "events," and "ideas-and-feedback" text channels and "Lounge," "Community Hangout," and "Stream Room" voice channels
- Local Community Template: "welcome-and-rules," "announcements," "resources," "general," and "meeting-plans," and "off-topic" text channels and "Lounge" and "Meeting Room" voice channels
- Next, you have to select whether your server is a “private” or a “public” one. This selection won’t make a functional difference, so you can skip the question by clicking the “skip this question” text.
- Now, it’s time to add a server icon and choose a good name for your server. Once you’re satisfied with them, click the Continue button.
- There you go! You now have your own server.
Creating a Server on iOS, Android, and Other Mobile Devices
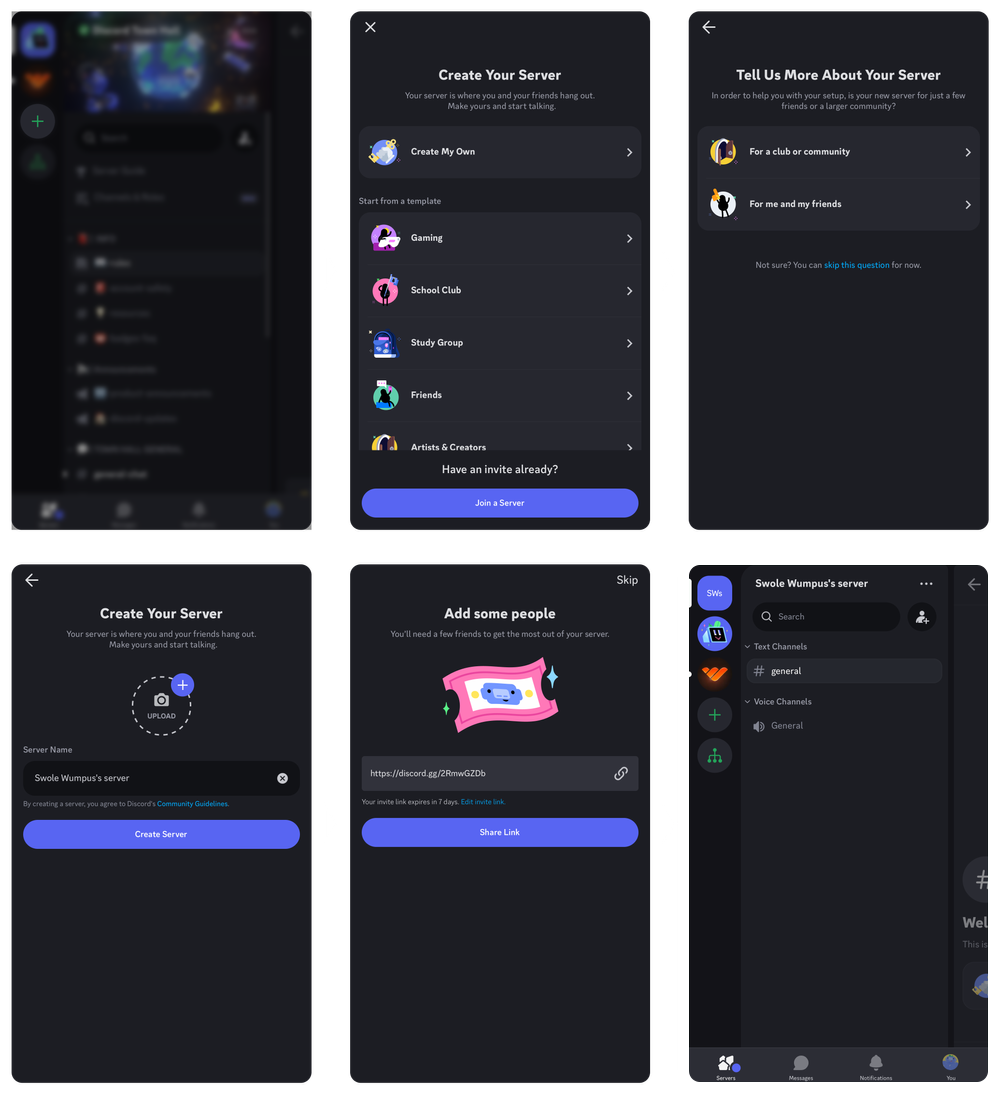
Creating a Discord server on iOS, Android, and other mobile devices is very simple, just like on the desktop. Follow these steps to create one yourself:
- Press the Add a Server button (plus icon) on your server list. This will open the Create Your Server window.
- In the "Create Your Server" screen, select either "Create My Own" to start from scratch (a "general" text channel and a "General" voice channel) or one of the templates below it to begin with a basic outline. Selecting a template will only create additional channels at the end, and it doesn't change any part of the setup process.
- Gaming Template: "general" and "clips and highlights" text channels and "Lobby" and "Gaming" voice channels
- School Club Template: "welcome-and-rules," "announcements," "general," "meeting-plans," and "off-topic" text channels and "Lounge," "Meeting Room 1", and "Meeting Room 2" voice channels
- Study Group Template: "welcome-and-rules," "notes-resources," "general," "homework-help," "session-planning," and "off-topic" text channels and "Lounge," "Study Room 1", and "Study Room 2" voice channels
- Friends Template: "general," "games," and "music" text channels and "Lounge" and "Stream Room" voice channels
- Artists & Creators Template: "welcome-and-rules," "announcements," "general," "events," and "ideas-and-feedback" text channels and "Lounge," "Community Hangout," and "Stream Room" voice channels
- Local Community Template: "welcome-and-rules," "announcements," "resources," "general," and "meeting-plans," and "off-topic" text channels and "Lounge" and "Meeting Room" voice channels
- In this step, select whether your server is a “private” or a “public” one. This selection won’t make a functional difference, so you can just skip it by pressing on the “skip this question” text below the options as well.
- Next, you have to select a server icon and a cool name for your server. You can always change them, so don’t sweat it. Once you’re satisfied, press the Create Server button to finish the process.
- After pressing the Create Server button, you might see the “Add some people” window, which will give you your first invite link and prompt you to invite others to your server.
- That’s it! You just created your own server.
The Basics of a Good Discord Server
There are tens of millions of servers out there, and while some of them are fantastic, others are not so good. If you have a public server, you have to compete with hundreds of thousands of servers to get members into your server and keep them in. To even have a chance among all your competitors, you should first get your server to the “good” level. There are a couple of things all good servers should have:
- Order—No one likes chaos. You need clear rules for your server and staff to enforce them.
- Sufficient channels—Two very common mistakes in server creation are creating too many or too few channels. You should pay attention to your channel plan to ensure that you have enough channels.
- AutoMod setup—AutoMod is a Discord feature that every server should utilize. It will help you prevent unwanted messages on your server.
- Sufficient roles—Differentiating member categories from each other is one of the most important parts of a server setup. You should create just enough roles to categorize all the members you have - some examples are admin, moderator, trial moderator, member, and new member.
- Active members—This is probably the hardest part to accomplish. A good server has active members. They talk actively during the day, and you can even stumble upon a night owl at 4 AM. If there’s someone to talk to at all times, the server is good. There are many ways to get active members. Events, good topics, server ads, and content are all helpful.
Taking Your Discord Server From Good to Great
You have a server, and it’s good. What now? Remember that no server is perfect, and there’s always room for improvement. In this section, we’ll discuss a couple of the best ways to improve your server.
Visual Design
As you might know, visual design is one of the most important parts of marketing. Even if your server has amazing content in it, it should be visually appealing enough to attract members. You should plan a brand image for yourself, create a good server icon, select an attractive name, define the primary colors of all your designs, etc.
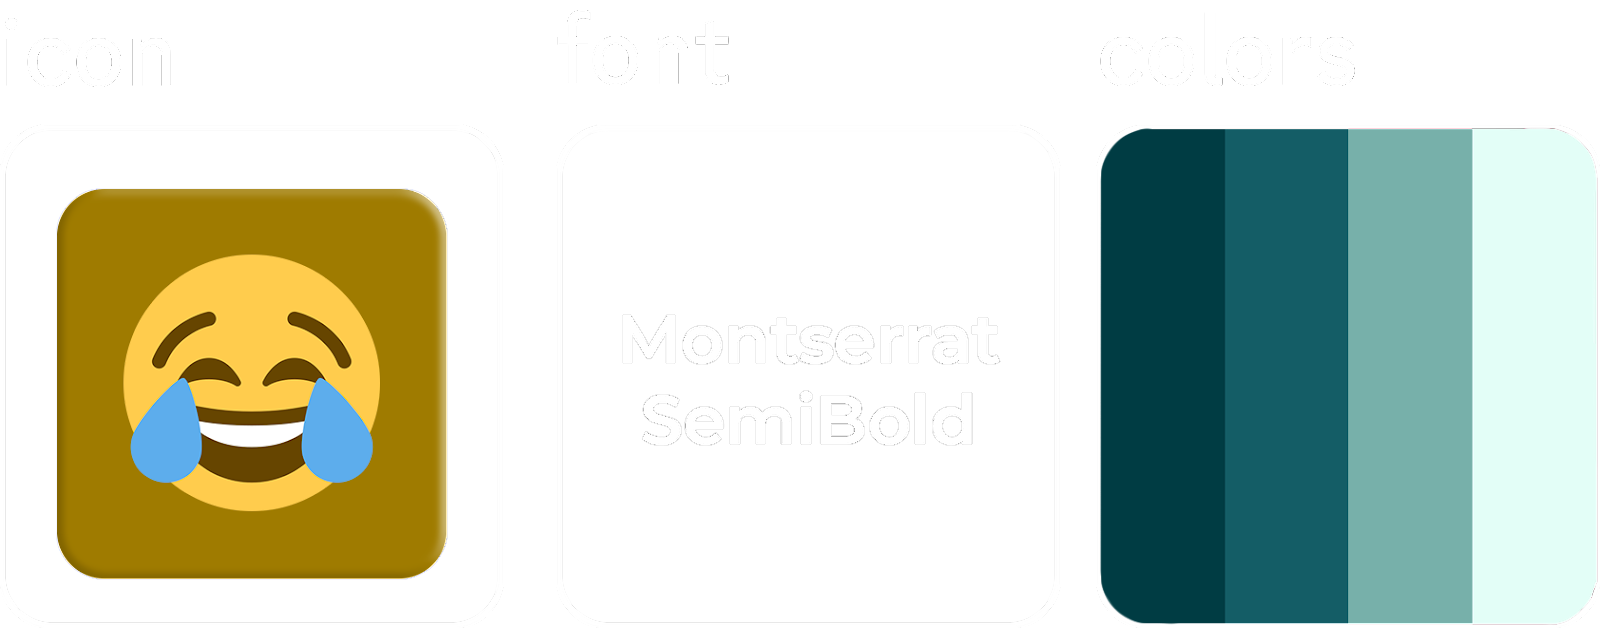
After finishing the plan, it’s time to use it to improve your server. If you have custom webhook messages, change their colors to one from your brand color palette. Apply the same palette to your role colors. Create emojis that vibe with your brand image.
Channel and Category Organization
A Discord server is nothing without its channels. Since they’re so important, you should pay serious attention when planning and creating them. First, you should have just as many channels as your members need. If you usually have three groups consisting of 8 people using your voice channels every day, you shouldn’t have 20 voice channels. If you see a channel, no matter the type, is inactive, consider archiving or even deleting it. Channel clutter will make your server harder to use.
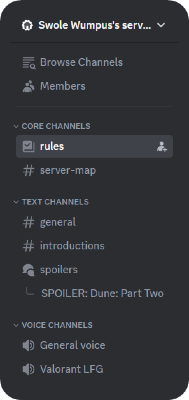
Same with categories, you should absolutely utilize them, but you shouldn’t overdo it. Try to find a few primary categories and list your channels under them.
The most common way to order channels and categories is core channels (like rules, announcements, server map, etc.) > high-traffic public channels > low-traffic public channels. Also, remember that server invite links redirect the user to the topmost channel.
Moderation Stability with Moderator Guidelines
A moderation system is one of the best additions to a Discord server, especially in terms of security. You alone couldn’t and shouldn’t handle all the moderation - rather, you should recruit moderators to help you. This means some of your users will want to be your moderators, and once they are, they will receive permissions like warning others, deleting messages, and enforcing the rules. If you want your server to be as good as possible, a critical thing to do when recruiting moderators is to onboard them to your team and your policies.
Imagine one of your moderators just banned a person for saying a bad word. A couple of hours later, another moderator mutes a person for saying that same bad word. When the user who got banned hears this, they ask you for an explanation. This is a very common situation, but it has a simple solution! When you onboard your moderators, try to provide them with a clear moderator guideline. A guideline will help your moderators stay in sync when enforcing your rules. They can also refer to the guidelines if they aren’t sure about what to do.
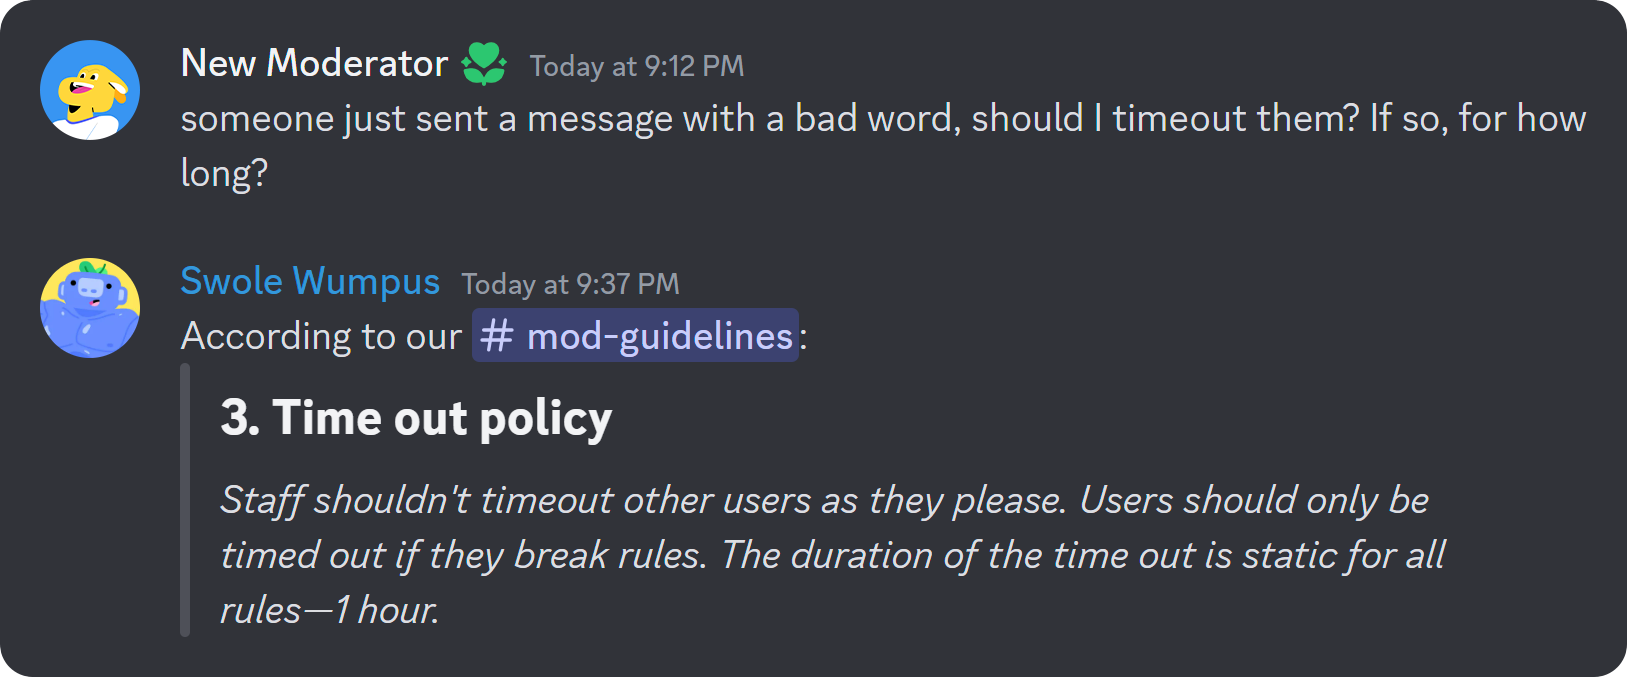
You should detail your server rules, the incentives you’re willing to provide, what your mods should do in situations, warnings, and which sanctions you enforce for each rule violation.
Role Organization
Roles are essential to Discord servers, so you should plan your roles as well. There’s a 250-role cap on Discord, and except in some instances, you’re not going to need more than 60. Don’t try to create a role for every hobby or interest. If you have a leveling system, keep it simple, like multiples of 5. Too many roles will clutter your user profiles.
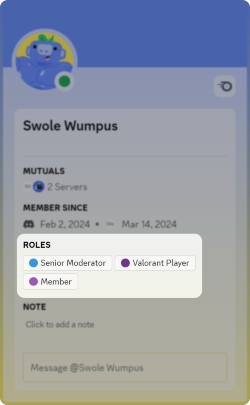
But this doesn’t mean you just keep it incredibly simple as well. You want just enough roles to allow them to express themselves. Here are some roles every great server should have:
- Admin
- Bots
- Moderator
- Trial Moderator
- Experienced Member
- Member
- Announcements
Bots
Everyone loves and uses bots. They’re an important part of Discord’s daily life. They can help with automating tasks, events, and all kinds of other things. But you shouldn’t add too many bots to your server. When adding a bot, try to see how your server would use it in the future, if they even use it. If you’re inviting an auto-moderation bot, think about how you’re going to use that, and if there’s another bot or built-in feature you already have, use them instead.
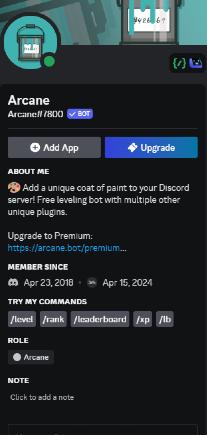
Try to implement bots that can actually help you and are related to your server’s topic.
Events
Great servers always make sure their members are engaged with the server. There are multiple ways to drive engagement, such as through giveaways and community projects. Events can be used as an umbrella term for things you do with your members collectively.
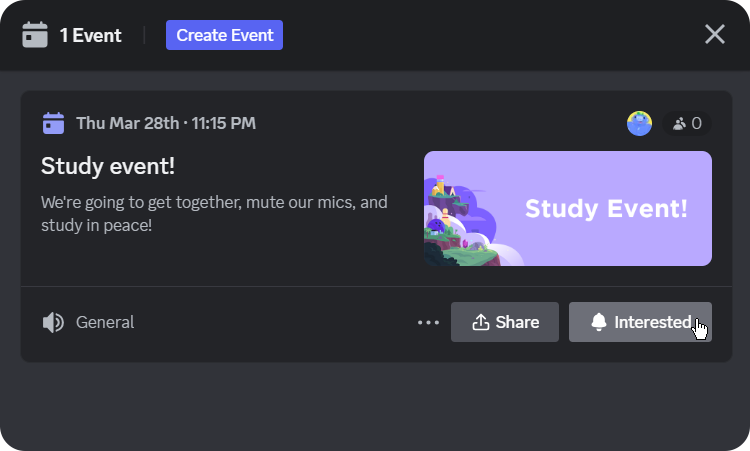
All great servers have staff members taking care of events: planning them, sharing them, and organizing the whole event. If you don’t have an event staff, you can assign your mods to run it. When trying to find events, try to think of events that are related to your server. Regardless of the topic, here are some event ideas:
- Drawing Night
- GarticBOT Tournament
- Custom Valorant Matches
- YouTube Watch Together
- Treasure Hunt
When organizing events, make sure to utilize Discord’s built-in event schedule feature.
Listening to Member Feedback
The journey of transforming your server from a good one to a great one has a crucial step you should keep in mind. Your goal should be improving your server in a way that fits your community. Try asking your members for feedback on current or upcoming features/content of your server. Let them submit suggestions with bots like Suggester and let them feel like they have an impact on the server.

Letting your members have a voice and listening to them will greatly improve your relations with your users and give them a feeling of belonging.
Create and Manage an Epic Discord Server with Whop
If you’ve followed through with us in this guide to making your server a great one, chances are you will spend effort on your server. Why not get something in return? Whop has been helping thousands of server owners with monetizing their servers - it can help you, too!
To charge your members for access or roles, sign up to Whop today. It takes less than 10 minutes to sign up, start selling, and generate income.
