Many hands make light work. It’s a great idiom, and a true one. Think about how amazing it would be to have a bunch of people working on a task that would be time-consuming for you - you now have time to invest in more important matters. The Bounties App is here to help exactly with that situation.
The Bounties App allows creators to set up a budget for specific tasks that they want their community members to complete for a reward that the creator determines. Creators can use the Bounties App to create bounties for social media shoutouts, sponsored content, brand promotion, and any other task you can think of - it’s an automated way to grow and promote your brand/product.
In this guide, we’re going to take a look at what the Bounties App is, how it works, and how you can set it up in your whop.
What is a Whop app?
To understand what a Whop app is, let’s first remember what a whop is. A whop is an online hub where you can sell products, create communities, blogs, online courses, and all kinds of digital products and services.
Let's think of a whop as your phone. When you first get your phone you have some basic features, but to really make the most of it, you need apps. If you're a keen cyclist you may want to add the Strava app, and if you're looking for love, perhaps you want Tinder. These apps are not automatically on your phone, but by adding them you design your phone to fit your needs.
You can think of Whop apps in that way. When you first create a whop, it will be a blank canvas without any functionality. As you add apps, like the Chat app, you’re going to be adding the functionality of a chat group. There are many apps on Whop, and each one serves a different purpose. Some examples are:
- Courses app: Allows you to create online courses with different lesson types and advanced analytics.
- Suggestions app: Allows your members to submit suggestions and vote on others.
- Web App: Allows you to embed websites into your whop.
- Forums app: Allows you to create forums and decide whether your members can post or not. One of the best features of the Forums app is that the contents are indexed by Google, meaning that you can generate engagement.
The Bounties App on Whop: what it is and how it works
The Bounties App on Whop is essentially a way to crowdsource things you want to be done. For example, a brand might create a bounty on the app to get creators to make sponsored content in their videos, and once they do, they can get paid. Let’s break it down so you can better understand how bounties, specifically for the example we’ve mentioned, work:
- First, the owner of the whop, you, creates a bounty by determining the task (promoting the brand, for example), budget per completion, and guidelines and publishing the bounty.
- Members of the whop can check the Bounties App for the bounty. Once they create a video promoting the brand, they can submit it for approval through the Bounties App.
- Once you approve the bounty, the budget per task will be deducted from your Whop balance (you need to have money in your balance to create bounties) and sent to the creator.
It’s that easy! This is a great way to generate content, gain engagement, promote your brand, and more. Since the Bounties App is very adaptable, it has a lot of use cases. For example:
- If you’re a musician, you can use the Bounties App to make other people promote your tracks. For example, you can set yourself a budget and offer to pay creators $0.20 for every 1,000 views they get on videos where they feature your song. Of course, they’d have to tag you in the video as well.
- If you’re a streamer, you can use the Bounties App to create clip bounties. When people clip funny or epic moments in your streams, they could share them on social media, and by following some guidelines (like count, view count, etc.), you can reward the good clips.
- If you’re a sports capper, you can use the Bounties App for suggestions within your sports picks community. For example, you may want to have users submit +EV lines for arbitrage opportunities. If you choose to use any of these, then you can reward your community member.
How to add the Bounties App to your whop
Adding the Bounties App to your whop is pretty easy, but first, let’s make sure you have a whop to begin with. If you don’t have a whop ready to go, you can take a look at our 5-minute guide to creating your first whop.
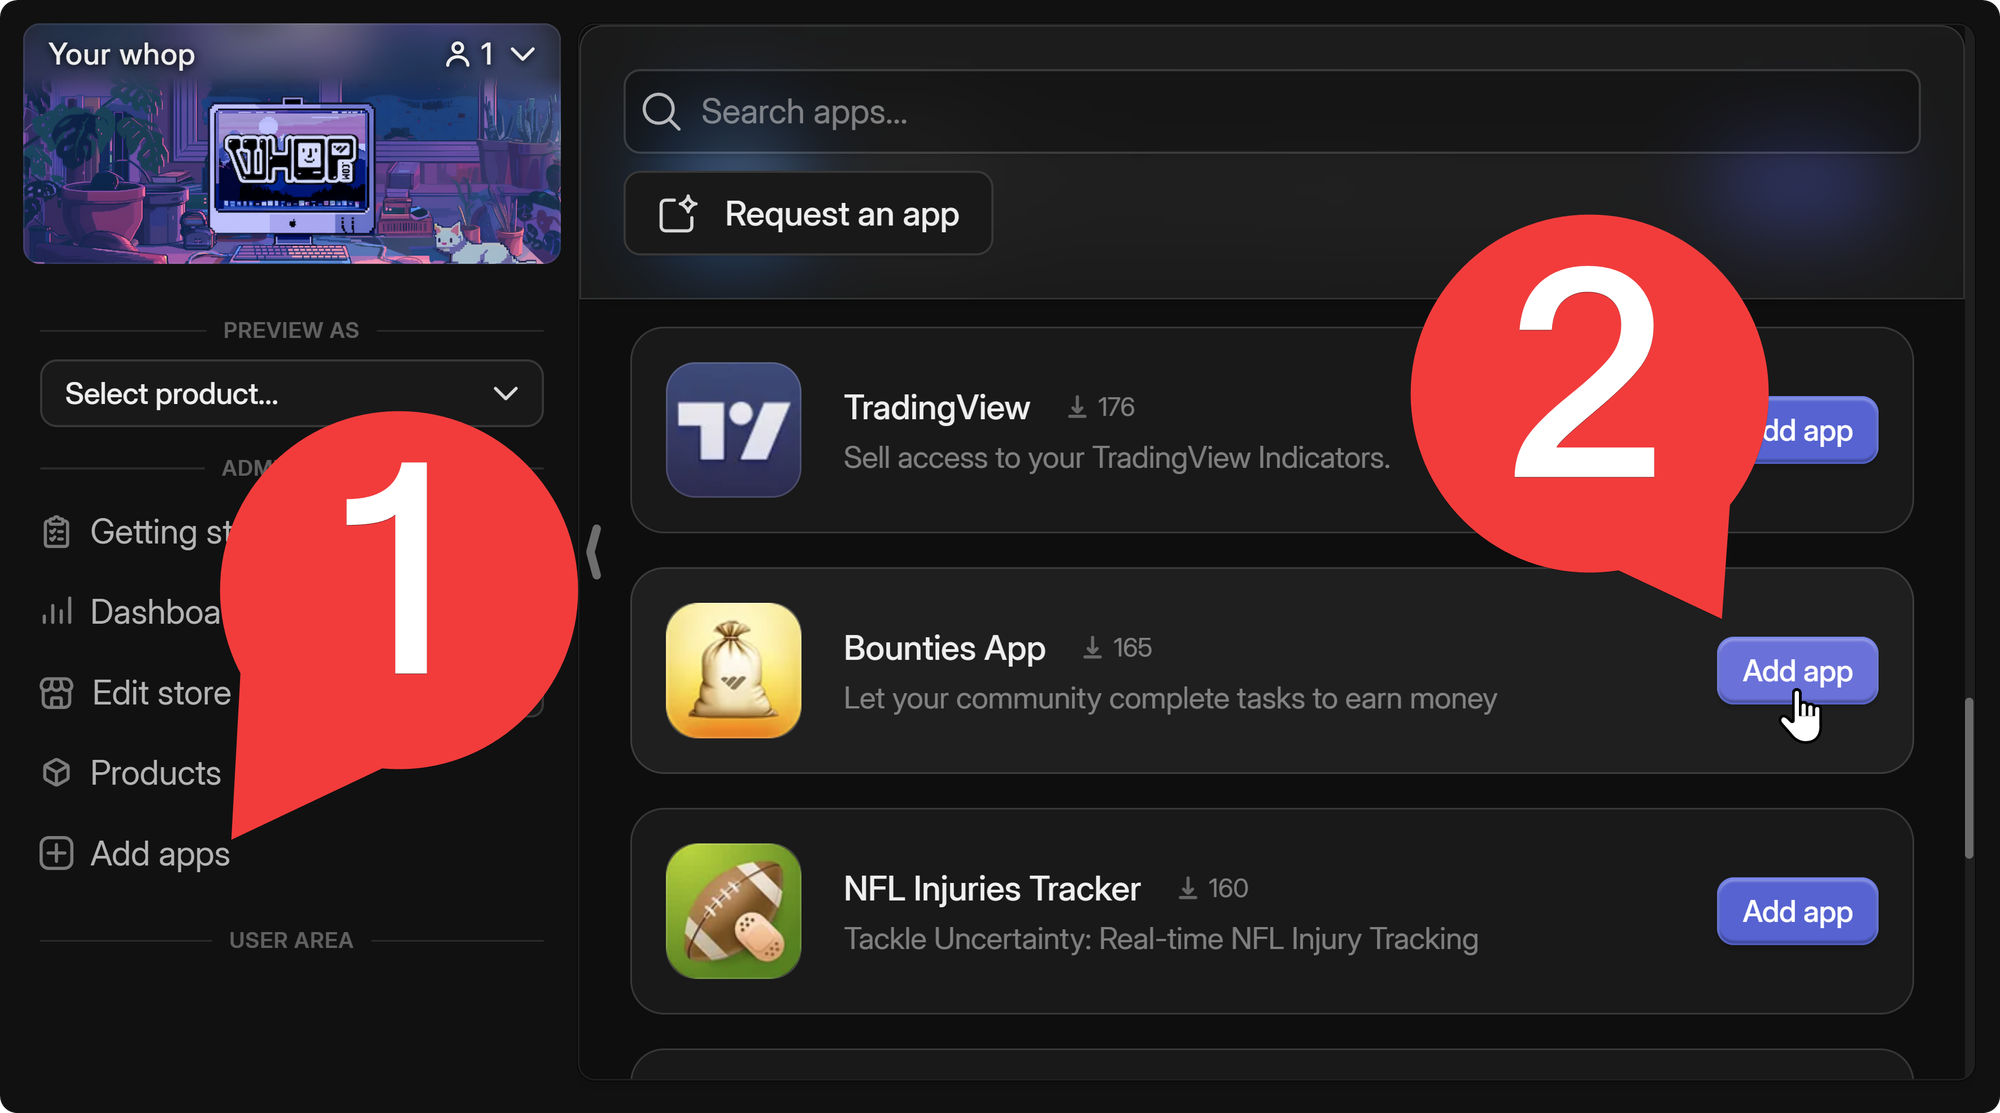
Once you have your whop ready, it’s time to see how you can add the app to it. First, let’s click on the Add apps button under the Admin Area of your whop. This button is visible to users in your whop team who have the App Manager role (or a role that’s higher than that.) This is going to take you to the apps list, where you can find all the apps you can add to your whop.
After finding the Bounties App, which you can do by looking for it in the list or using the search bar at the top left (or top, depending on your screen size), click the Add app button. This is going to take you to the Set up section of the Bounties App.
Using the Bounties App
The Bounties App has three sections, like most whop apps: Set up, Preview as user, and Access - each one allows you to access different settings or views of your app. When you first add the app, you’ll be taken to the Set up section of it. So, let’s take a detailed look at each section, starting with Set up.

1. Set up
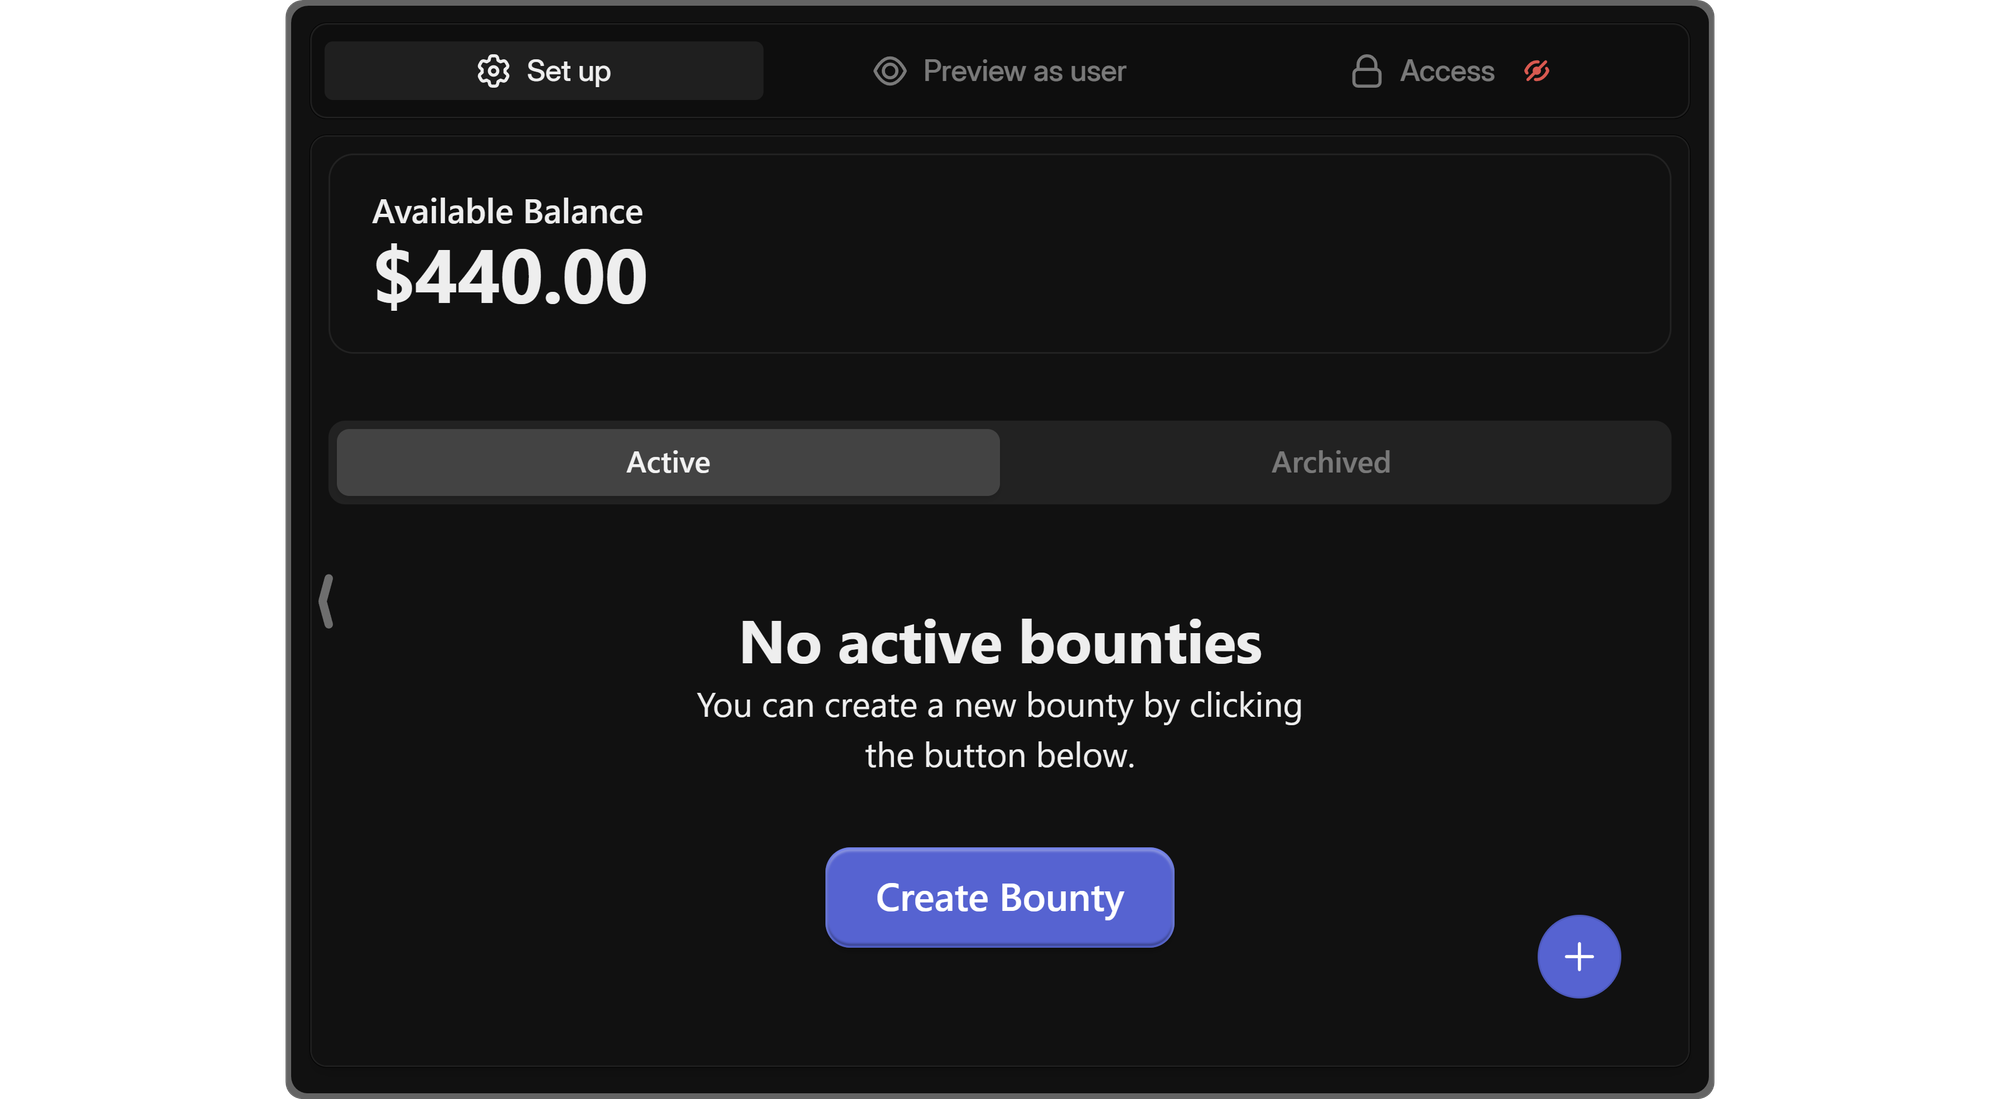
The Set up section of the Bounties App is very simple, and it takes less than a couple of minutes to create a bounty, assuming you have solidified a bounty idea. In the Set up section, you can see four things:
- Available Balance
- Active and Archived bounty tabs that list bounties you create
- A Create Bounty button, which will be visible only if you don’t have any bounties.
- Another Create Bounty button (+ icon) at the bottom right of your screen.
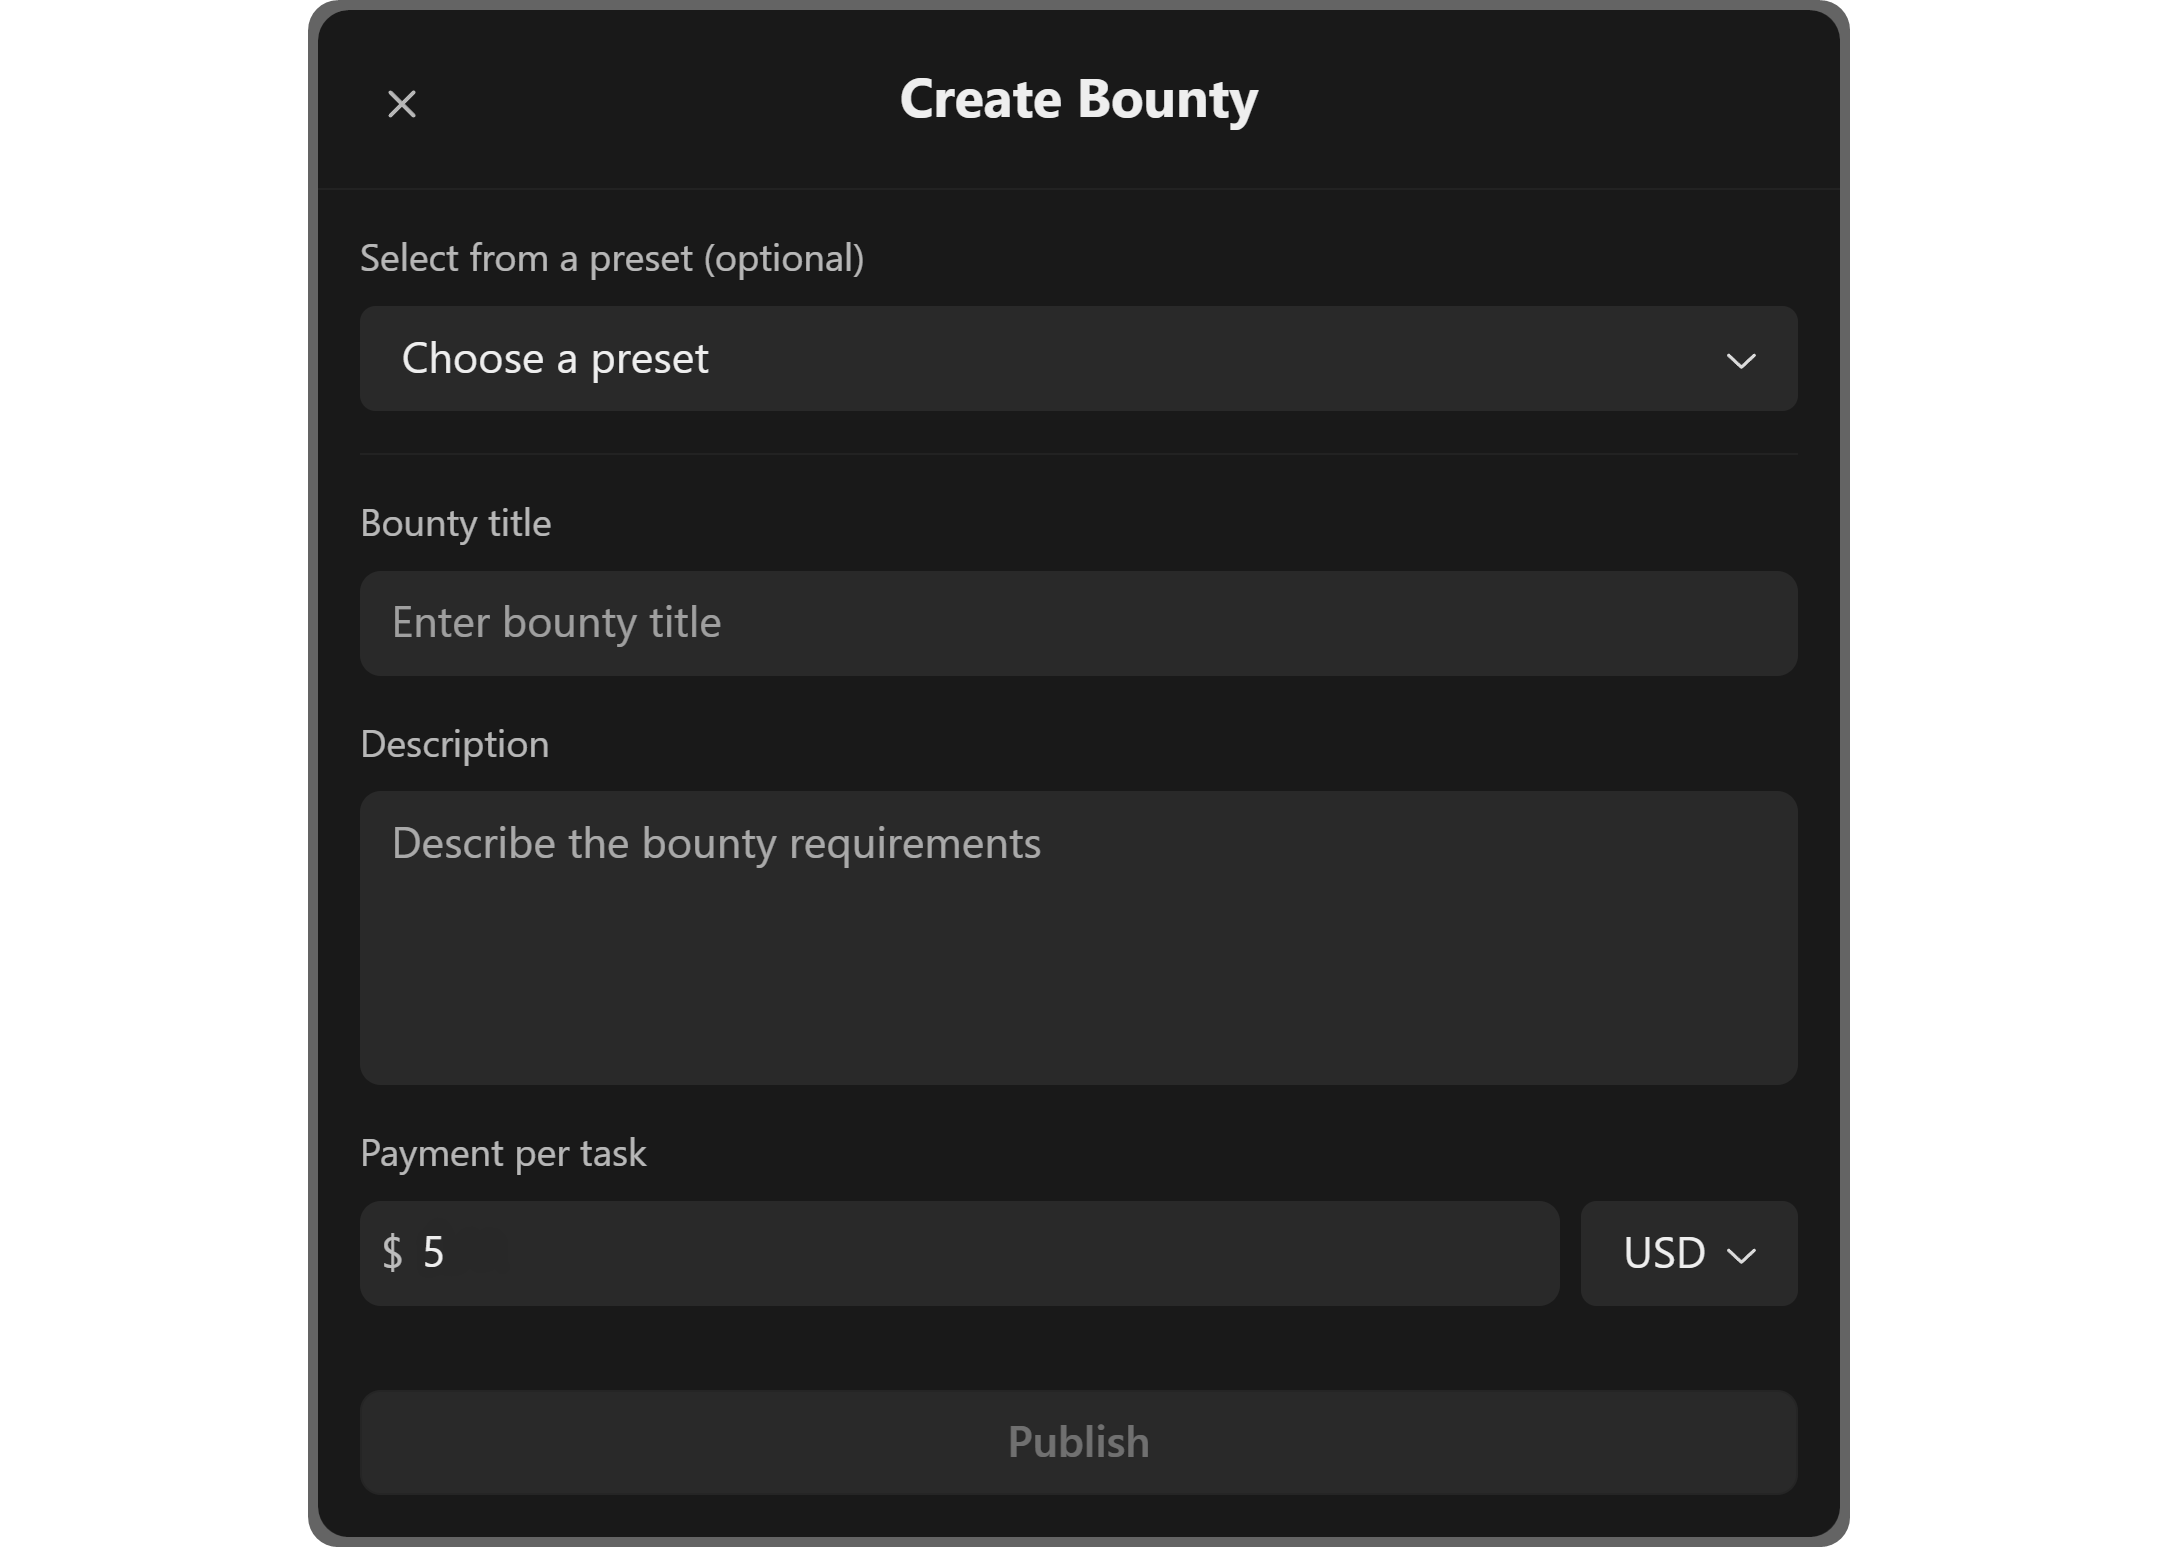
When you click the Create Bounty button, you’re going to see the Create Bounty popup. There, you can easily create a custom bounty or select a preset. Let’s examine the parts of the popup:
- Select from a preset (optional): As we mentioned, you can create custom bounties or select a preset. When you click the dropdown menu under this section, you’re going to see five presets like Content Creation, Bug Bounty, and Social Media Post. Selecting a preset is going to fill out the title and description sections of the bounty but it won’t change the payment per task.
- Bounty title: As its name suggests, you can set the title of your bounty in this section. This should be short and to the point.
- Description: The description section is where you write down the details of the bounty. You should talk about what the bounty is exactly about in detail, list the guidelines, deadlines, and all other things that people should be aware of. The more easy-to-understand and explanatory your description is, the less confusion and back-and-forth you’re going to have with your users.
- Payment per task: This section requires you to determine the amount that the user will be paid if you approve their bounty. You can also change the currency using the dropdown menu to the right.
Once you’re done filling out all the fields, you can click the Publish button to create your first bounty.
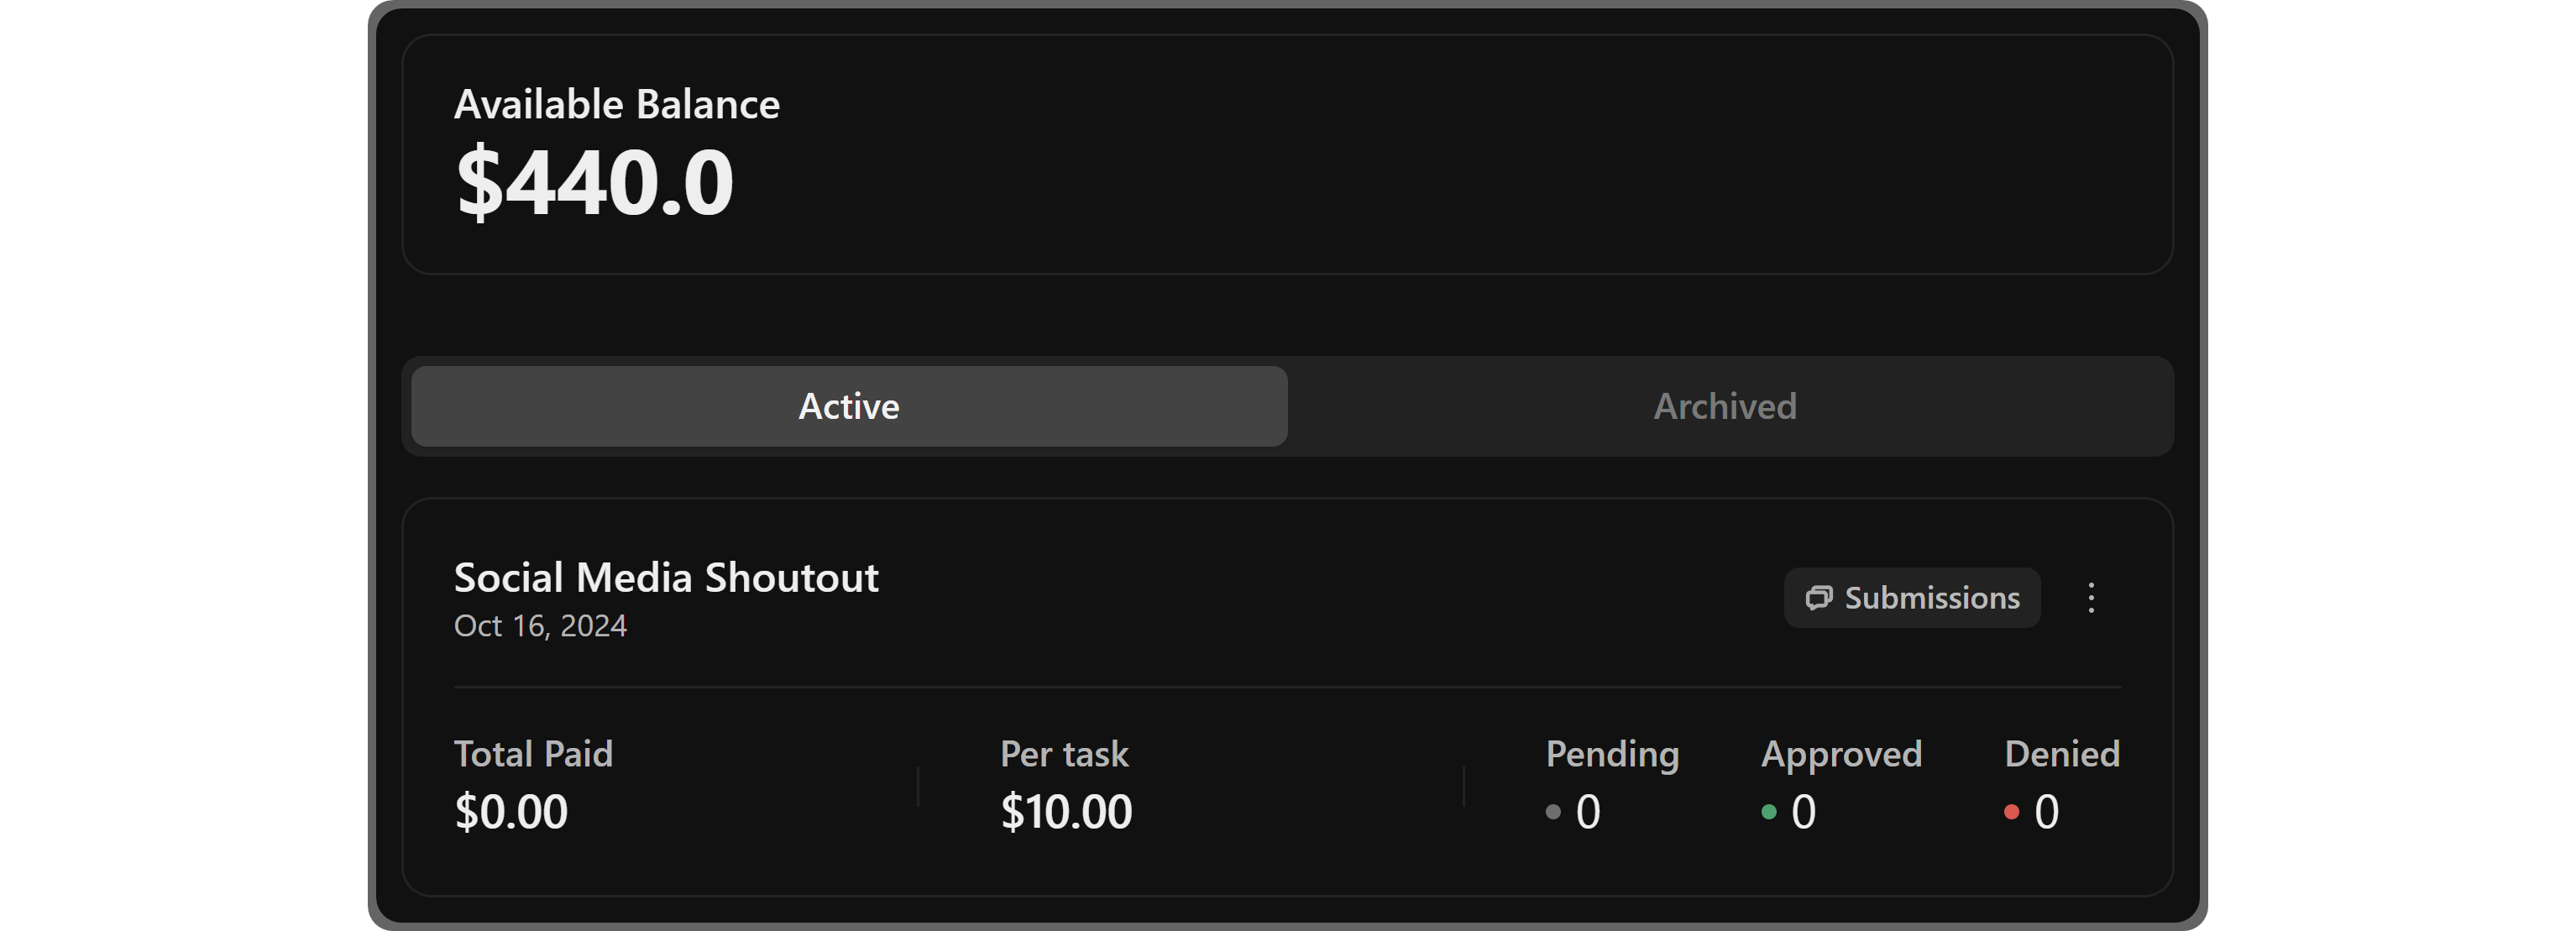
After you’ve created your bounty, you’ll see that its card will have replaced the Create Bounty button - from now on, you should use the + icon button at the bottom right of your screen to create bounties.
The bounty card is going to display a bunch of details like total paid and per-task amounts and pending, approved, and denied bounty counts.
Clicking the Submissions button of a bounty is going to display a list of all the submissions that the bounty has received. In the list, you’ll see the user’s submission description and two buttons: Approve and Deny. Clicking the Approve button will transfer the submission to the Approved category and the user will be paid.
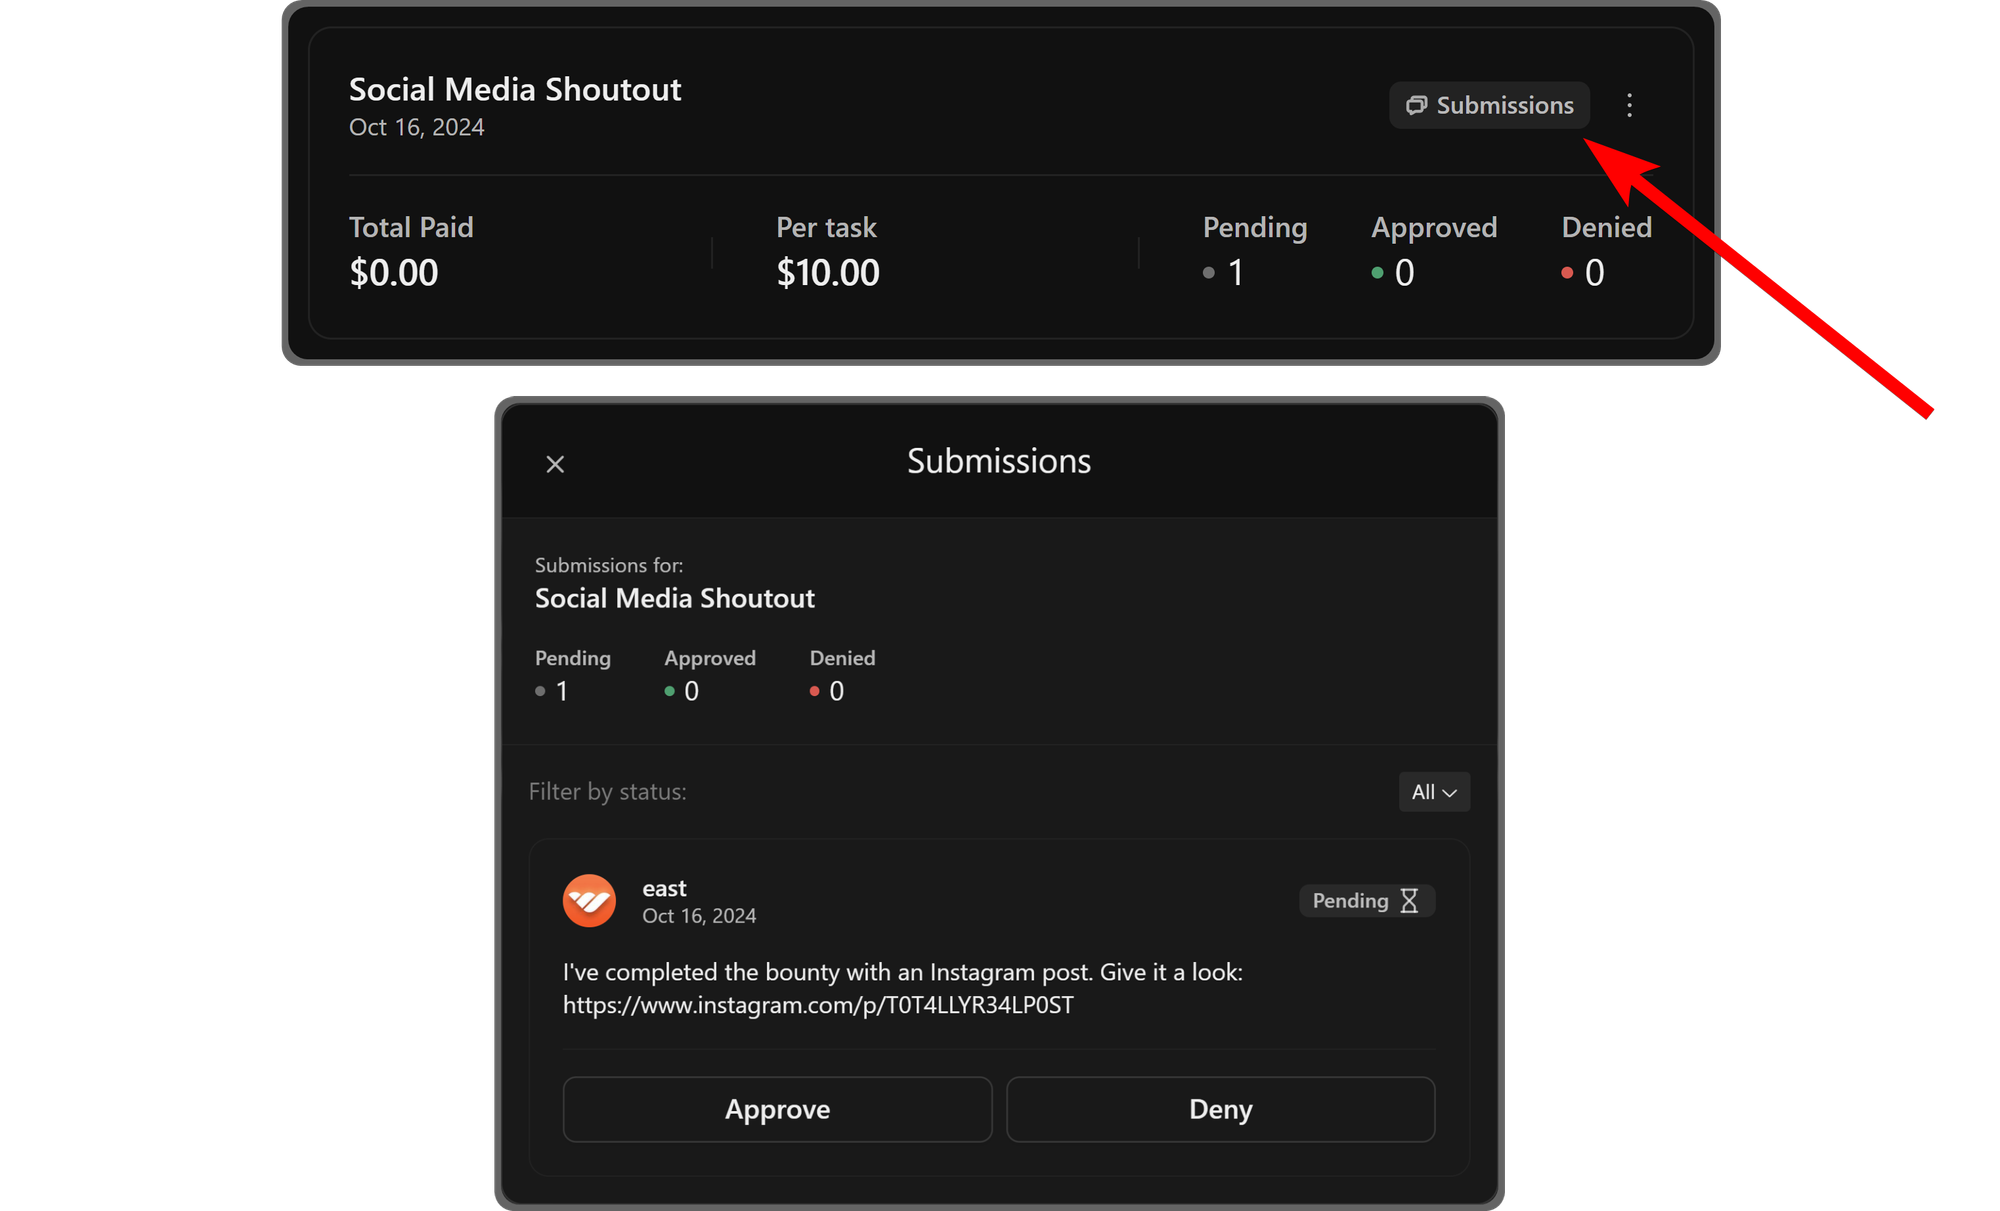
If you click on the three-dot menu at the top left of a bounty card, you’re going to open the context menu of it. There, you can edit the bounty, duplicate it, transfer it to the archive tab, and display the submission list.

2. Preview as user
The Preview as user section allows you to see the app from the perspective of regular users - since they won’t be able to see the tab buttons of the apps, this is what they’re going to see. In this view, you’ll see two tabs: Bounties and Submissions.
The Bounties tab will list all the bounties that you’ve created and published in the Set up section of the app. The Submissions section, on the other hand, will list all the submissions that the users themselves have made.
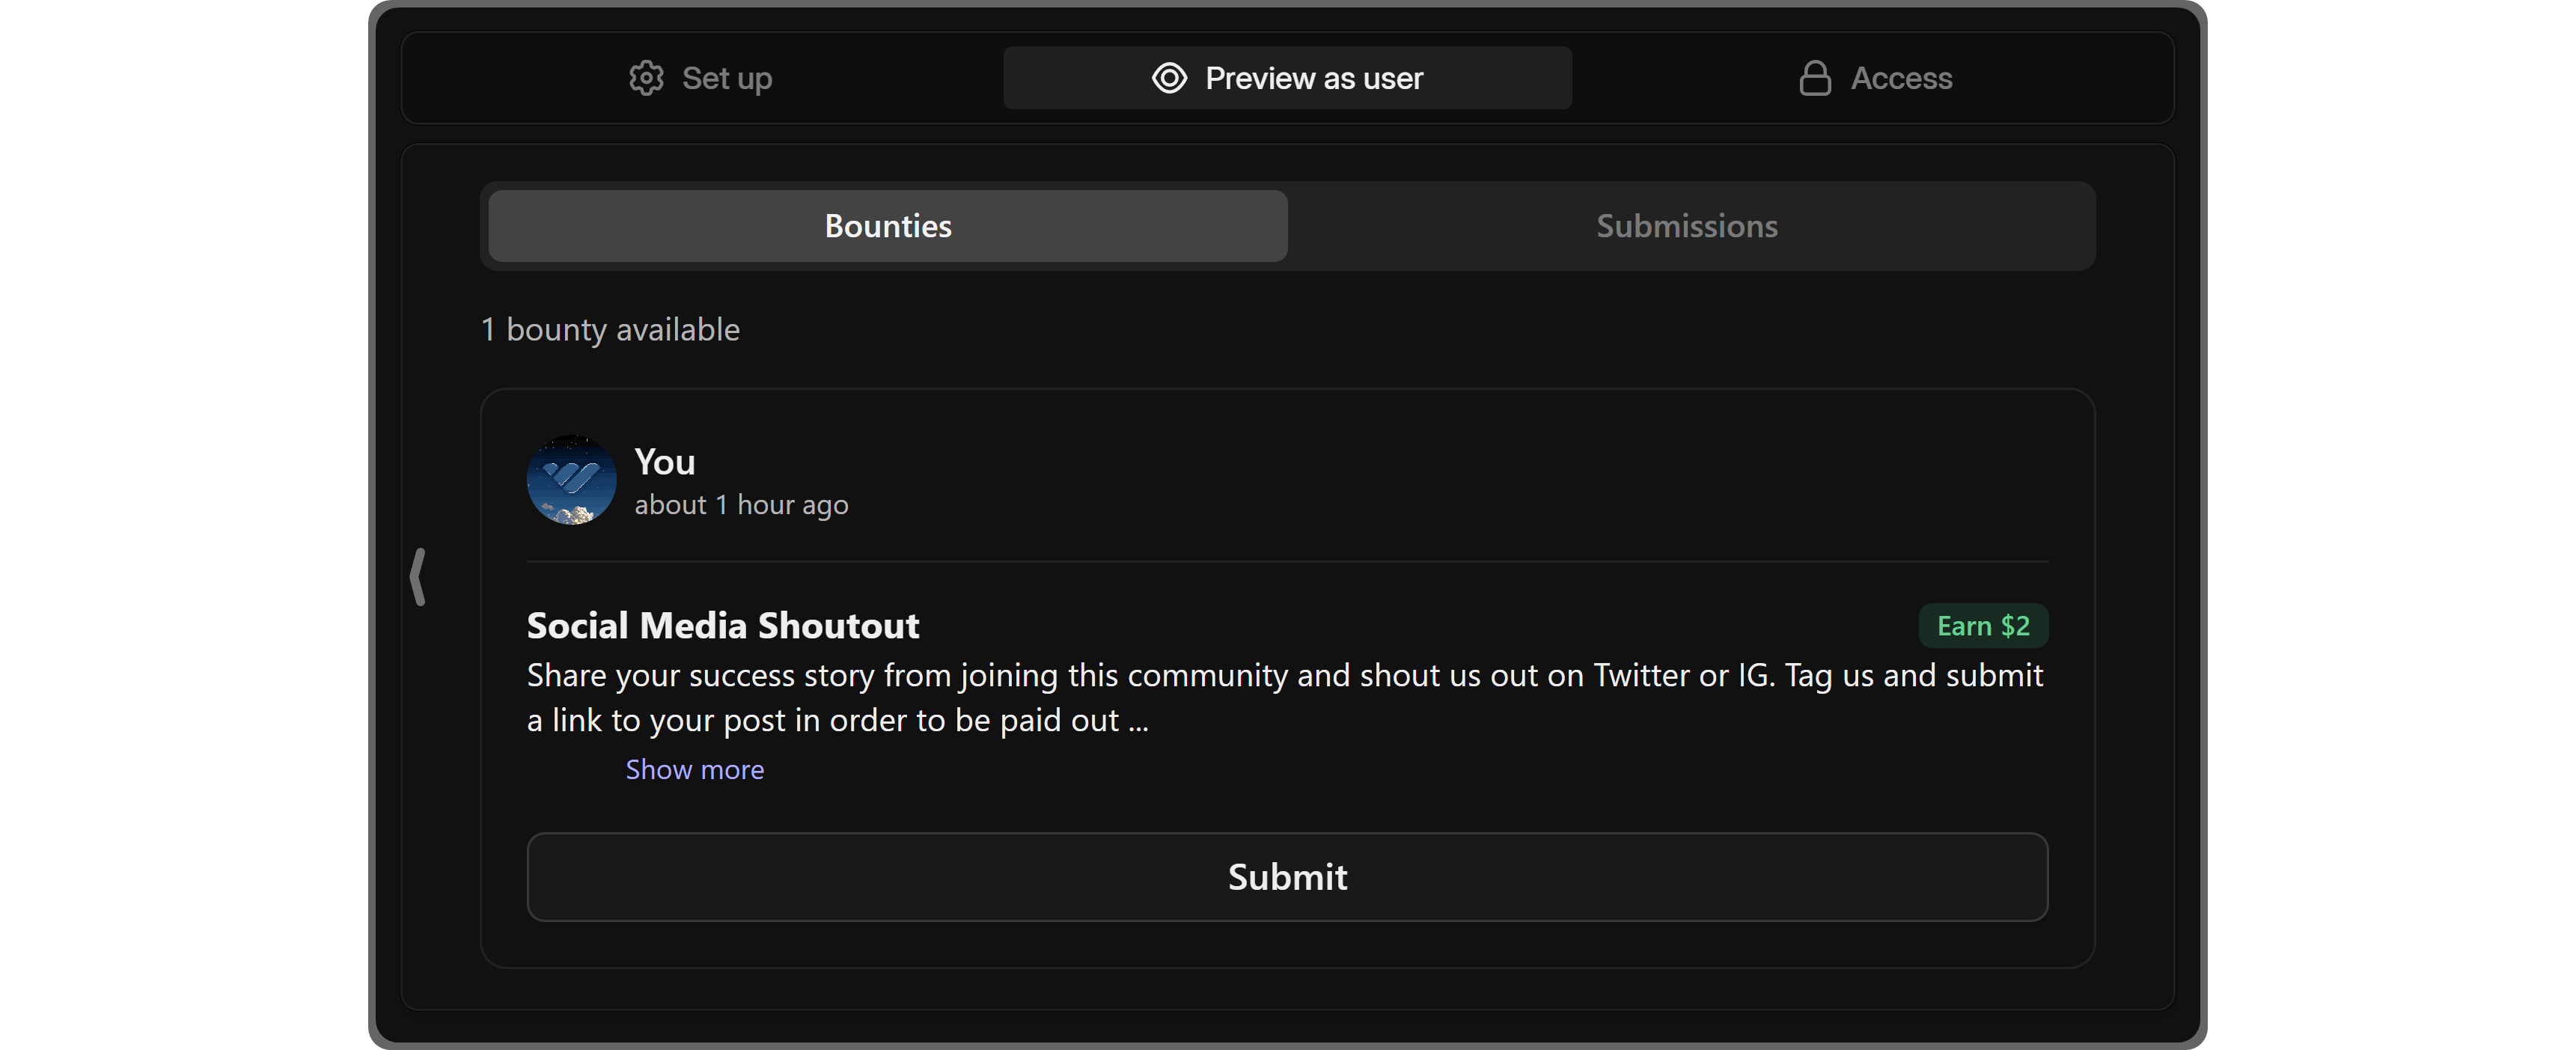
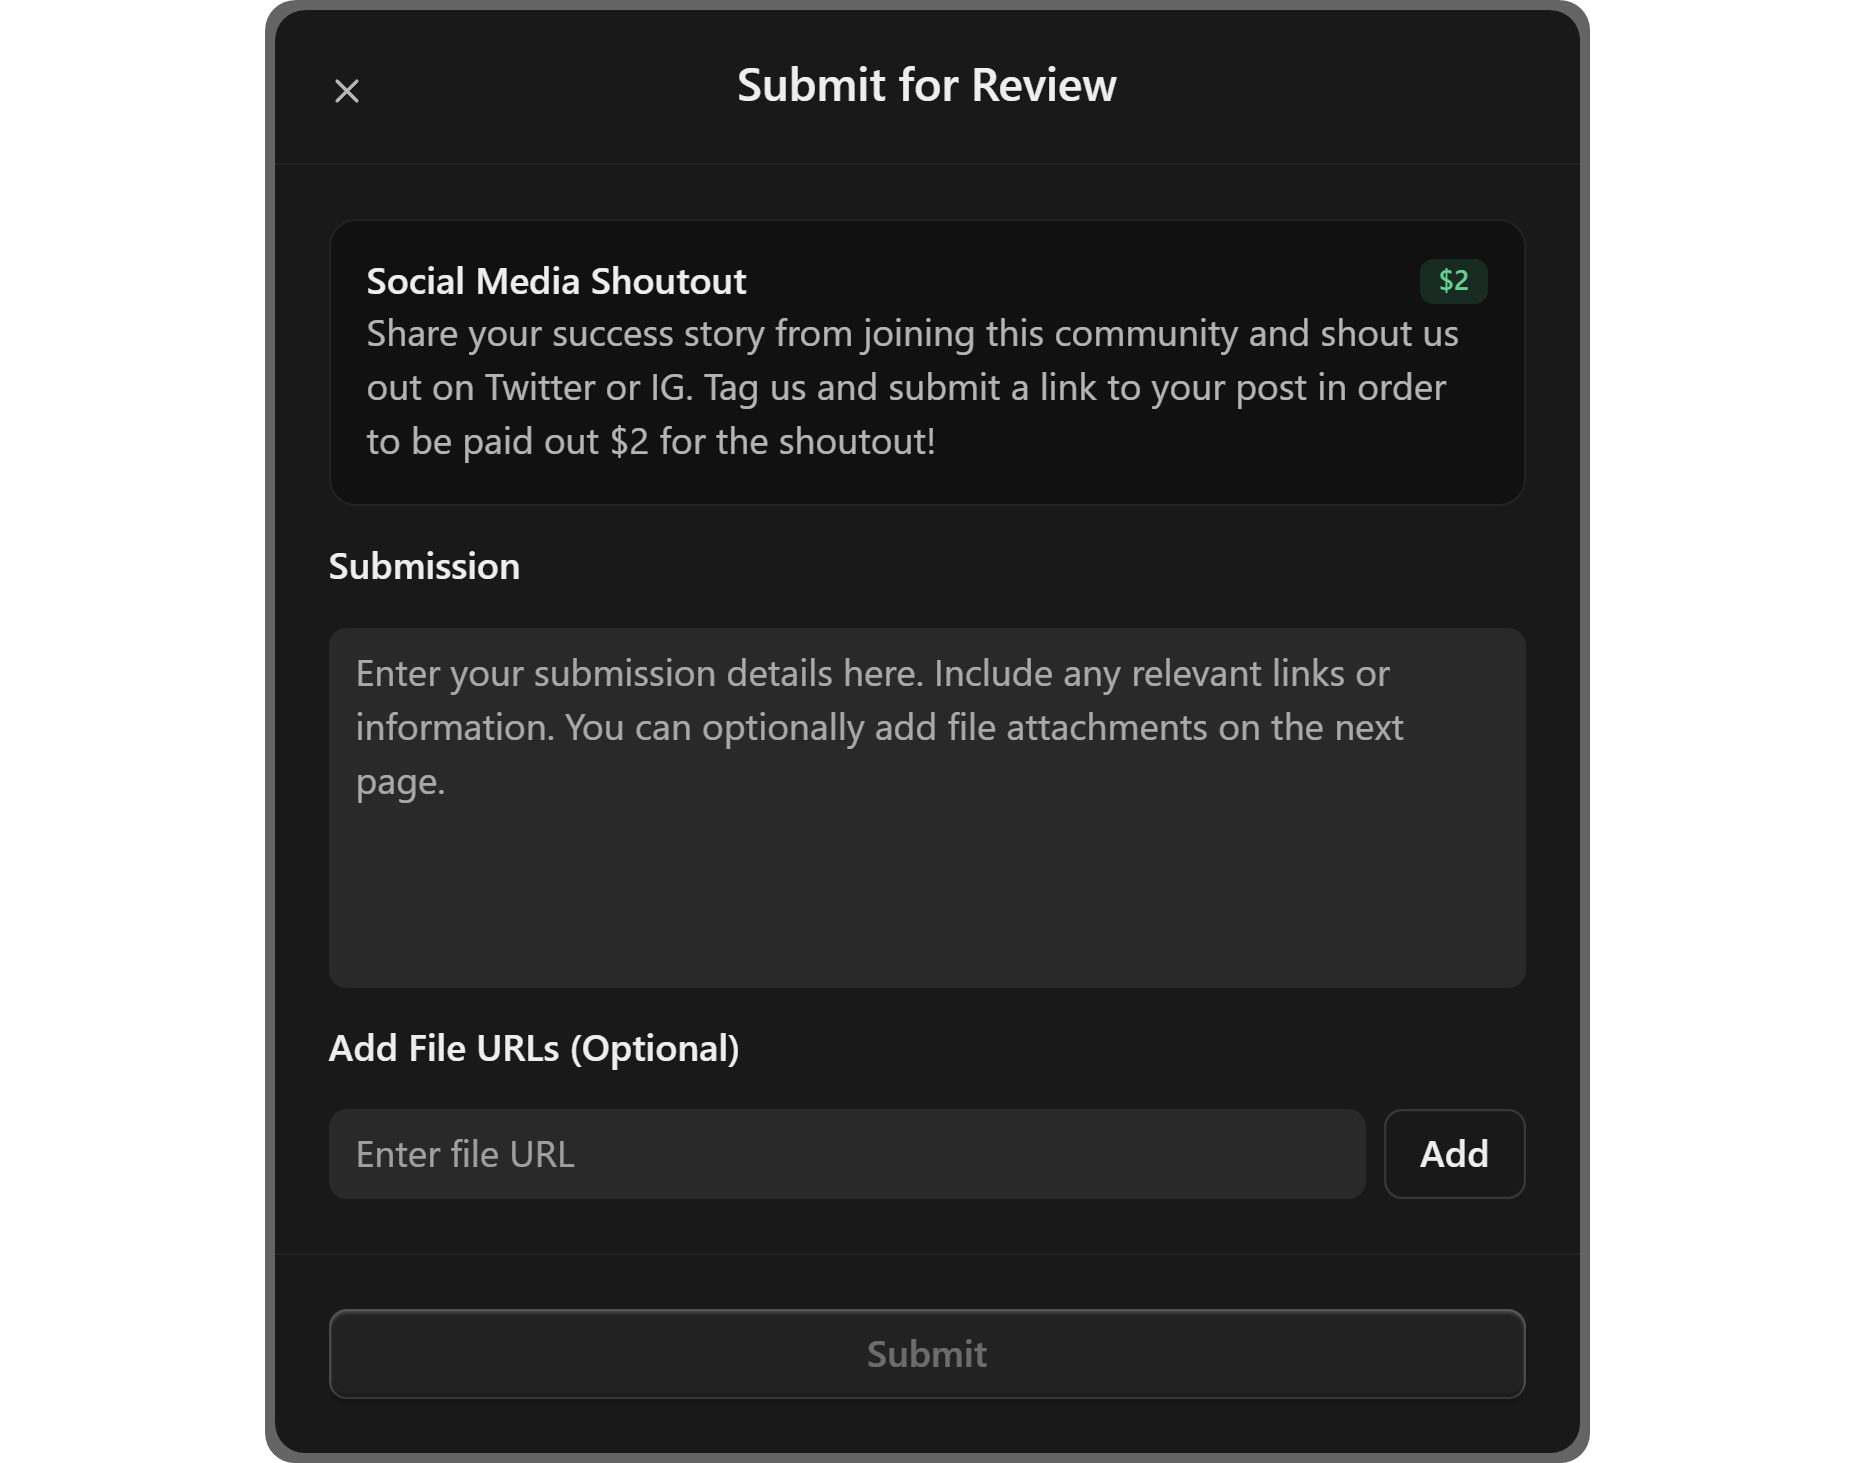
You can click on the Submit button below a bounty to see what your users would see if they wanted to submit a bounty. The submissions popup has the description of your bounty and two input fields. The first one is the submission description field, where the user can write down the details, if any, about their submission. The second one, “Add File URLs”, is an optional field where users can input file URLs.
3. Access
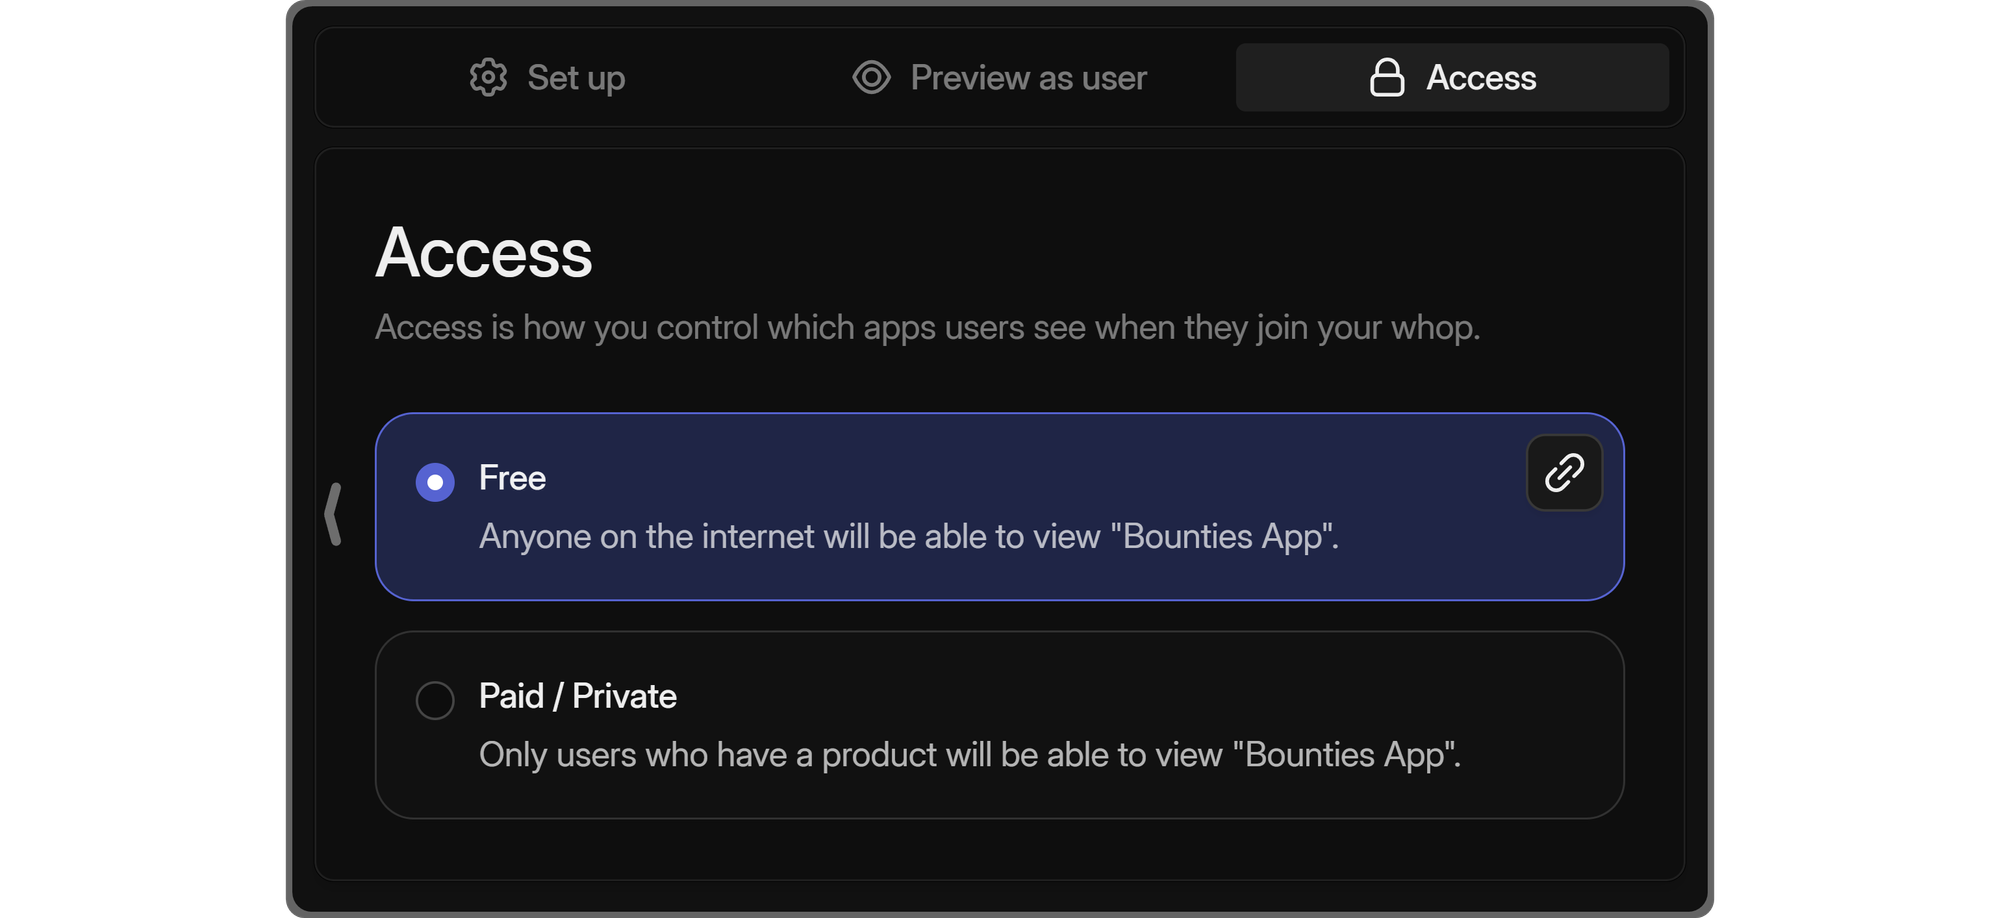
The Access tab is where you determine how people can access the app. When you click on the Access button at the top of your screen, you’ll be met with two options: Free, which will be selected by default, and Paid/Private. Almost all Whop apps have these two options.
Selecting the Free access type is going to make the app usable for everyone on the internet. As long as they have a link to your whop/app (or if your whop is listed on the marketplace), they will be able to use the Bounties App to submit submissions. This is ideal for people who want to reach a wider audience.
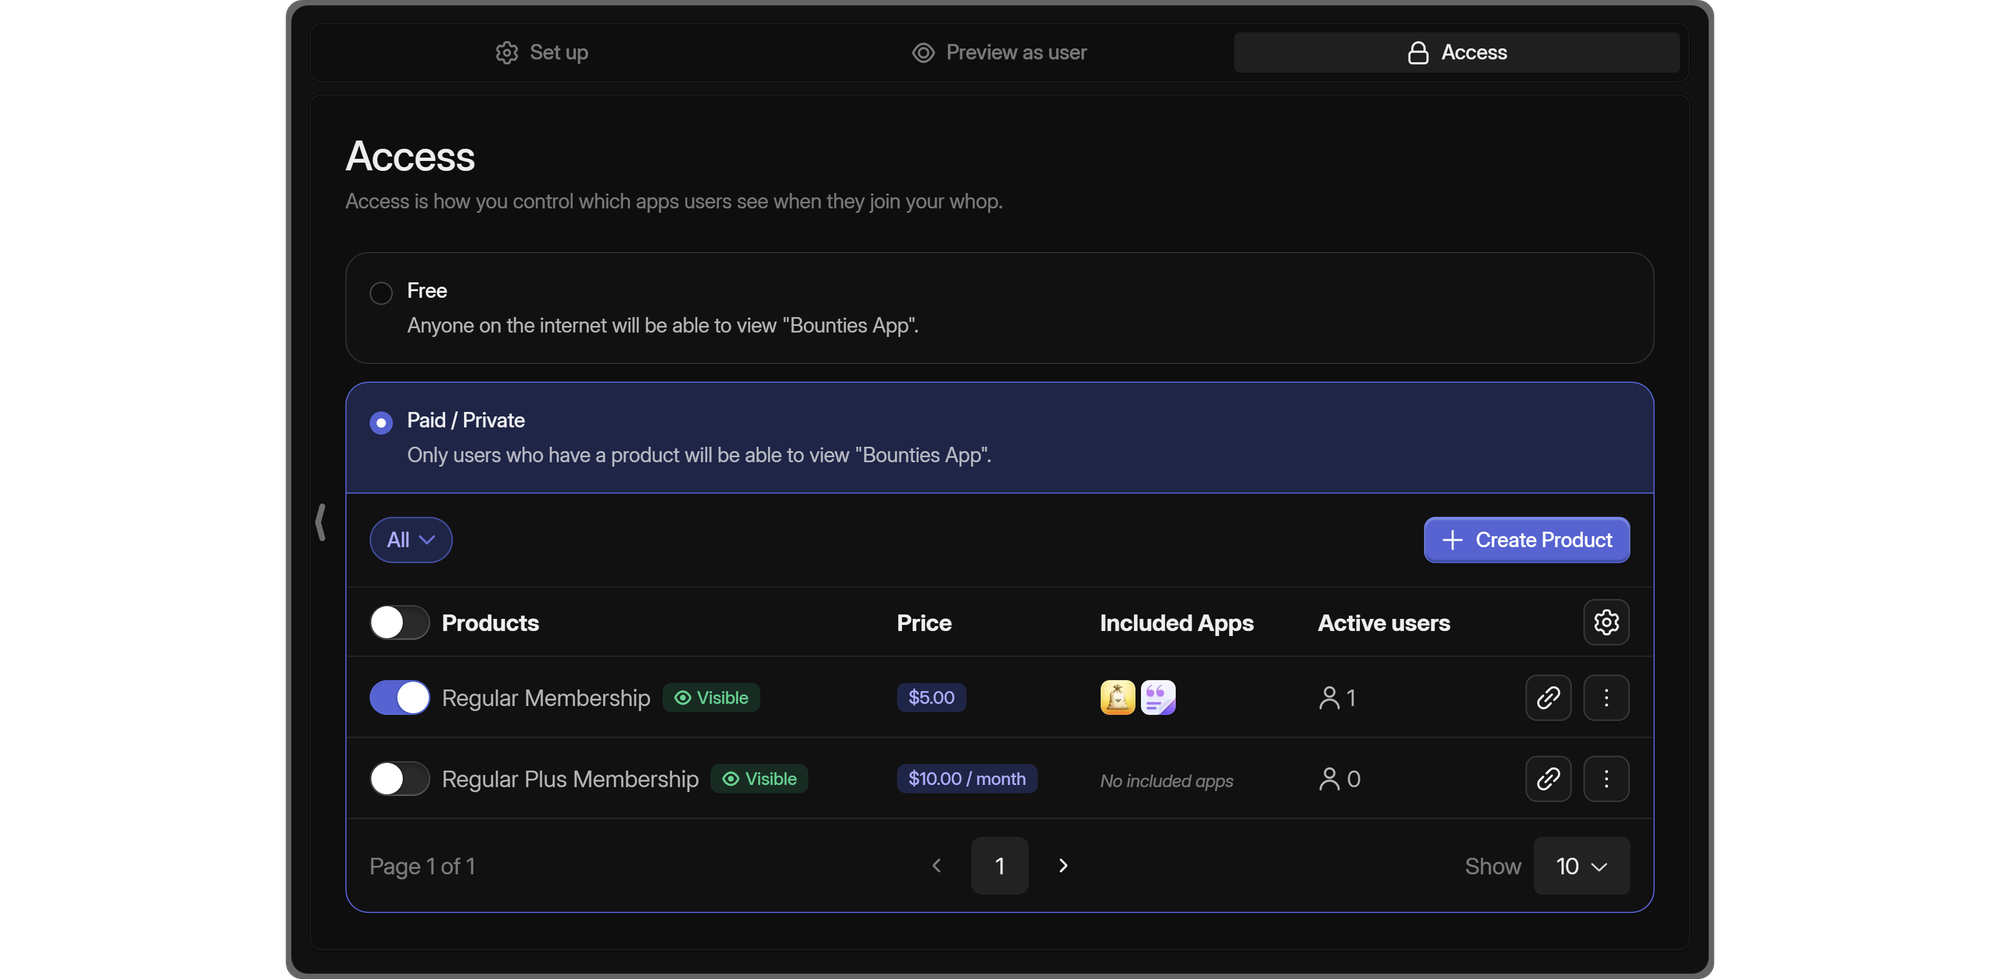
Selecting the Paid/Private option is going to display a list of all the products on your whop. If you don’t have any, you’re going to see a button prompting you to create a product - in this case, you should check out our guide on creating whop products to learn how you can create them in under 2 minutes.
The products in the list will have toggle buttons to the left of them. Toggling a product means you’ll be linking the app with the product - so only members who own that specific product(s) will be able to use the app. Since products on Whop can be paid, free, private, waitlisted, and more, you’re going to have greater control over how people use the Bounties App.
Outsource your tasks with Whop
Whop is the home of thousands of premium online businesses and communities, and yours could be one of them. Now that you know how you can use the Bounties App to let your community complete tasks to earn money, you’re one step ahead of the rest. Check out our other guides, and join Whop University to learn more and be a part of the community.
Signing up to Whop and starting selling access to your platform will take less than 10 minutes.
